
I’d been itching to bake something fancy for awhile. Saturday was my sister’s birthday, and she and my parents wanted to come out and visit us, so I happily volunteered to make her a birthday cake. I stewed for awhile about what to make… there are far too many good ideas out there! But, no matter how much time I spend on Pinterest, when I need to make a special dessert I will most likely make a cheesecake. And it’s got “cake” in the name, so it qualifies as a birthday cake, right?
Besides, cheesecakes are kind of my thing.
I don’t do “cheesecakes” in 9 x 13 pans, I don’t do no-bake cheesecakes. If I’m going to do it, I’m going to go all out and make the real thing. If I don’t have the time to make a real cheesecake, I’ll make something else.
My go-to cookbook when I need a cheesecake recipe is this one:

This book was a gift from my sister-in-law a few years ago. It has just about every flavor of cheesecake you’d ever need. I love that each cheesecake also has a topping, and it’s so easy to mix and match cheesecakes with different toppings, or use a topping completely your own.
To make a good cheesecake, you need to make sure all your ingredients are at room temperature. I took my cream cheese, eggs, and strawberries out a good three hours before I got started.

Place a cookie sheet on the bottom rack of your oven to catch any drips then preheat the oven to 350 degrees. My oven has two baking features: “Bake” cycles the top and bottom heating elements, “choice bake” only heats from the bottom. I use the “choice bake” setting for my cheesecakes because I don’t want the top to brown.
I like to put a layer of parchment on the bottom of my springform pan. I just lay it taut and close the springform around it, then trim off the excess. Grease the bottom and sides of the pan – you can use butter, but I prefer to grease my pans with shortening. This is a 9-inch springform pan.

Pulse 20 whole chocolate sandwich cookies in the food processor until they’re a coarse crumb (think Panko).

Then add 5 ounces of melted butter and give it a couple more pulses to incorporate it.

Press the butter and cookie crumb mixture firmly into the bottom and slightly up the sides of a springform pan and set aside. (Apparently you didn’t need a photo of this step)
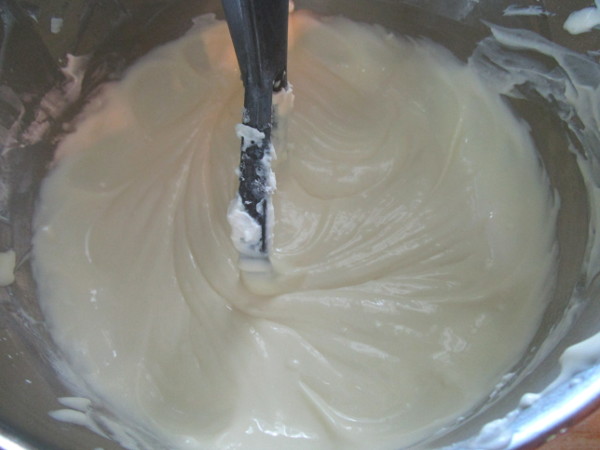
Put four 8-ounce blocks of cream cheese in your mixing bowl. I start by giving the cream cheese a quick whip in my mixer (about 20-30 seconds), then add 1 cup of sugar and 3 tablespoons of cornstarch.

Once that is smooth, add 4 large eggs, one at a time, making sure to fully incorporate each egg before adding the next. Be sure to scrape the side of your bowl a few times too. Then mix in 2 teaspoons of vanilla extract.
Measure out 3/4 cup of the mixture and place it in a small bowl. To this bowl, add 2 tablespoons of cocoa powder and 3 tablespoons of powdered sugar and mix until it is well incorporated, then set aside.


Back in the original bowl mix in the 12 ounces of thawed frozen strawberries along with their juice, 2 teaspoons of strawberry flavoring, and 1/2 teaspoon of lemon extract.

Now, we’re going to layer the two different batters in the pan, starting with half of the strawberry mixture.

Then half of the chocolate mixture. It’s thick and there’s not terribly much of it, so don’t worry too much about the distribution. At least I didn’t. (I suppose if you want to make it look perfect you could put it in a piping bag and pipe circles or lines with the chocolate batter)

The rest of the strawberry.

Finally, the rest of the chocolate.

Gently run a butter knife through the batter to create a swirl effect. Try not to hit the crust as you’re doing so.

Bake at 350 degrees for 15 minutes, then reduce the heat to 200 degrees and continue to bake for an additional 2 hours or until the center is no longer shiny or jiggly. Mine took an additional 15 minutes.
Take the cheesecake out of the oven and carefully run a knife between the cake and the pan to release the sides. Return the cake to the oven, turn it off, and leave it for 2 hours to slowly cool.

Chill overnight in the refrigerator. I left it in the springform and set a plate on top of it, because with my luck something would have fallen on it had I left it uncovered. There was a little condensation on it the next morning that I carefully blotted off with a paper towel.
Decorate as desired before serving. I did the chocolate covered strawberries as recommended in the book along with a homemade whipped cream. I wish I would have had the foresight to have my mom bring a pretty cake plate!

After I got a photo of my sister with her cake (which I promised not to share, although it turned out really cute!), I served each plate with an extra dollop of whipped cream and a chocolate covered strawberry.

As if chocolate covered strawberries weren’t fancy enough, I couldn’t help myself from adding a white chocolate drizzle. I told you at the beginning, I wanted to make something fancy. I mean, who wouldn’t want this for their birthday cake?!


You must never post something this fabulous unless you can bring it to my house! It looks amazing!
LikeLike
I bet this is amazing!
LikeLike
It has clear images and process. They look so yummy. Something to try in the weekend. Thank you For sharing at Talk it Up Thursday.
LikeLike
Kimberly this looks delish. I did my first real cheesecake at least as an adult! this year. A co-worker who was a chef gave me a tip that I also read about somewhere else. Do you ever bake yours in a pan of water? I wrapped the springform pan in aluminum foil then placed in a glass baking dish of water. It’s supposed to keep it moist and from cracking. Thanks for sharing this recipe!
LikeLiked by 1 person
I’ve heard of baking cheesecakes in a water bath but I’ve never tried it. I think the first time I made a cheesecake I put a pan of water in the oven with it but haven’t put the cake in the water bath like you did. I’ve had very good luck with technique I used here.
LikeLike
WOW – yummy, just love it
Thank you for following my blog. Hope you find it interesting and like the recipes our members tried and tested.
Would you be interested to be a Guest poster with us, and share some of your awesome recipes on our blog?
Have a look at:
https://cookandenjoyrecipes.wordpress.com/2016/09/09/update-fellow-bloggers-sharing-is-caring-recipe-exchange/ and leave me a note in the comments of this post, with a link to your recipe, if you’re interested. That will be just fantastic. Hope to hear from you soon 😊
LikeLike